This article contains affiliate links. We may earn a commission.
You want a first printer that won’t box you in. It should be simple to learn with PLA and PETG, yet ready to handle ABS or PC inside an enclosure when your projects get ambitious. It should also make clean first layers routine—without adding gadgets you have to calibrate. The QIDI Q2 3D Printer aims squarely at that brief: an enclosed CoreXY with a 65 °C chamber, a 370 °C hot end, and a zero-offset leveling approach so your early prints are straightforward and your later goals don’t require buying a second machine.
Who the QIDI Q2 3D Printer is for
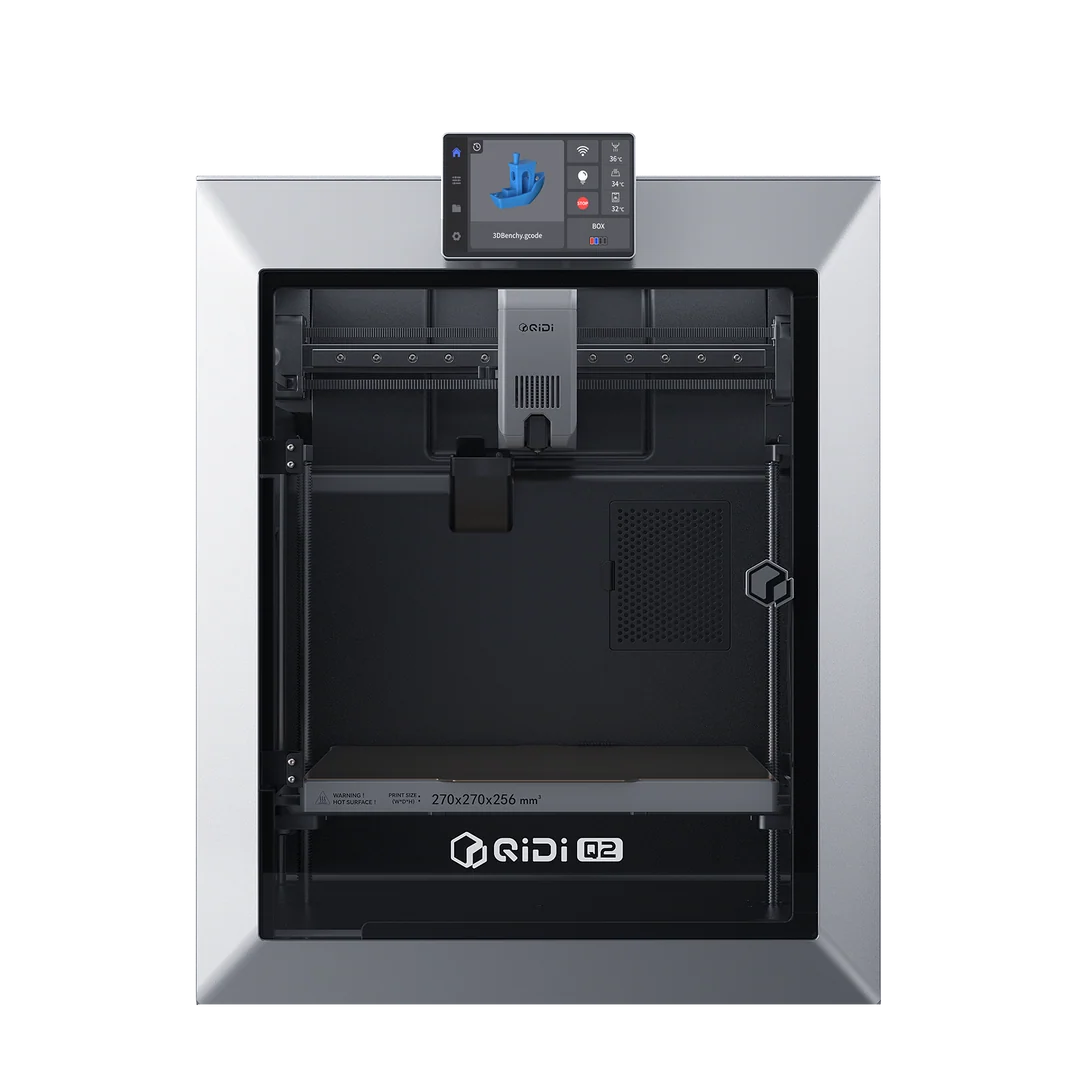
If you’re choosing your first serious home printer and want an enclosed CoreXY that grows with you, the QIDI Q2 3D Printer is positioned as a single platform that covers early wins and future materials. QIDI lists a 270×270×256 mm build volume, a hot end capable of 370 °C, and second‑generation active chamber heating that reaches up to 65 °C. The motion system is CoreXY on a full‑metal frame with linear guide rails, and the leveling sensor uses the nozzle itself to remove probe offsets. For indoor setups, Q2 integrates 3‑in‑1 air filtration and states US MET certification. Multi‑color and multi‑material printing is available by adding the QIDI filament box accessory later, so you don’t have to decide on day one.
Entry-level that grows with you is the idea: start with PLA or PETG, then move to ABS, ASA, PA, or PC when your designs demand tougher parts. With an Enclosed CoreXY, 65 °C chamber, you can keep projects inside a controlled environment rather than improvising enclosure add‑ons. And the 370 °C nozzle for more materials leaves headroom if you plan to experiment with composites.
The tradeoff for this capability is size and complexity. An enclosed CoreXY is larger and heavier than a basic open‑frame printer, and multi‑color requires a separate accessory. But if you prefer to buy once and grow into the feature set, this configuration makes practical sense for home use.
CoreXY motion and first-layer precision explained
Motion design and first‑layer accuracy determine how quickly a new owner gets reliable results. QIDI focuses on a leveling approach that removes probe offsets, plus motion components intended to minimize surface artifacts at higher speeds. Here’s how those details change your setup and printing day to day.
Zero-offset leveling in practice
Using the nozzle as the sensor means there’s no gap between where you measure and where you print. QIDI’s description of its load‑cell based system emphasizes real contact, zero probe offset, and hands‑free automatic leveling. For a beginner, the practical effect is that you don’t have to dial in a separate Z‑offset value or worry that a probe sees a different surface than the nozzle. You still need a clean build plate and a suitable surface, but once those are in place the machine can map the bed with the tool you actually print through.
Zero-offset leveling uses the nozzle, which makes sense if your goal is consistent first layers across materials. It also helps when you change plates or surfaces: rather than re‑teaching a probe’s offset, the printer references the same contact point each time.
Belts, rails, and resonance control
QIDI calls out smart resonance control alongside higher tooth‑density 1.5GT belts. The company’s claim is reduced ripple or VFA compared with typical peers, which matters most when you push speed or print tall smooth walls. Linear guide rails and a full metal frame round out the stability story, aiming to maintain accuracy over long‑term use.
Smart resonance control + 1.5GT belts won’t remove every artifact in every scenario, but they give you more headroom before ringing becomes obvious. In practice, you can start with balanced profiles, see the surfaces you’re getting, and then raise speed cautiously as you learn where quality starts to fall off for your chosen material.
Materials at home: chamber heat and filtration
Printing at home is about both capability and comfort. Chamber temperature affects adhesion on engineering polymers, and filtration helps manage particles from hot‑end and material byproducts. QIDI specifies a 65 °C actively heated chamber, a broad material list, and a 3‑stage filter inside the machine.
Heated chamber benefits
ABS, PC, and glass‑ or carbon‑filled blends benefit from a warm build environment because it reduces temperature gradients, warping, and layer separation. QIDI states that the Q2’s second‑generation active chamber heating reaches up to 65 °C and is designed to improve interlayer bonding for materials such as ABS, PC, and ABS‑GF. Combined with a 370 °C hot end, the supported range expands beyond PLA and PETG to include ASA, PA, PC, TPU, and reinforced composites.
Two caveats are worth knowing. First, very soft TPU can be finicky; QIDI recommends around 95A hardness and notes that ≤85A grades may affect print quality. Second, even with a warmed chamber you still need plate adhesion that matches the material—use the correct side of the plate and keep it clean to get the benefit of stable chamber conditions.
Filtration and certification
For indoor setups, Q2 integrates a 3‑in‑1 filter: a G3 pre‑filter, an H12 HEPA element, and activated carbon. QIDI states high efficiency at capturing 99.5% of particulates and notes US MET certification, alongside flame‑retardant chamber materials and multi‑sensor closed‑loop temperature control. Filtration can’t remove every odor, so normal ventilation habits still help, but the onboard system is designed to handle fine particles while you print.
If you want to review the filtration details and supported materials directly, visit QIDI and look for the Q2 specifications and FAQ. That page also outlines the recommended TPU range and a link to a TPU setup guide.
3-in-1 air filtration, 99.5% particulate capture and US MET certified safety are the key home‑use claims. Pair those with a 65 °C chamber aids ABS and PC approach and remember that TPU best at 95A hardness is a practical constraint.
Multi-color and multi-material with QIDI BOX
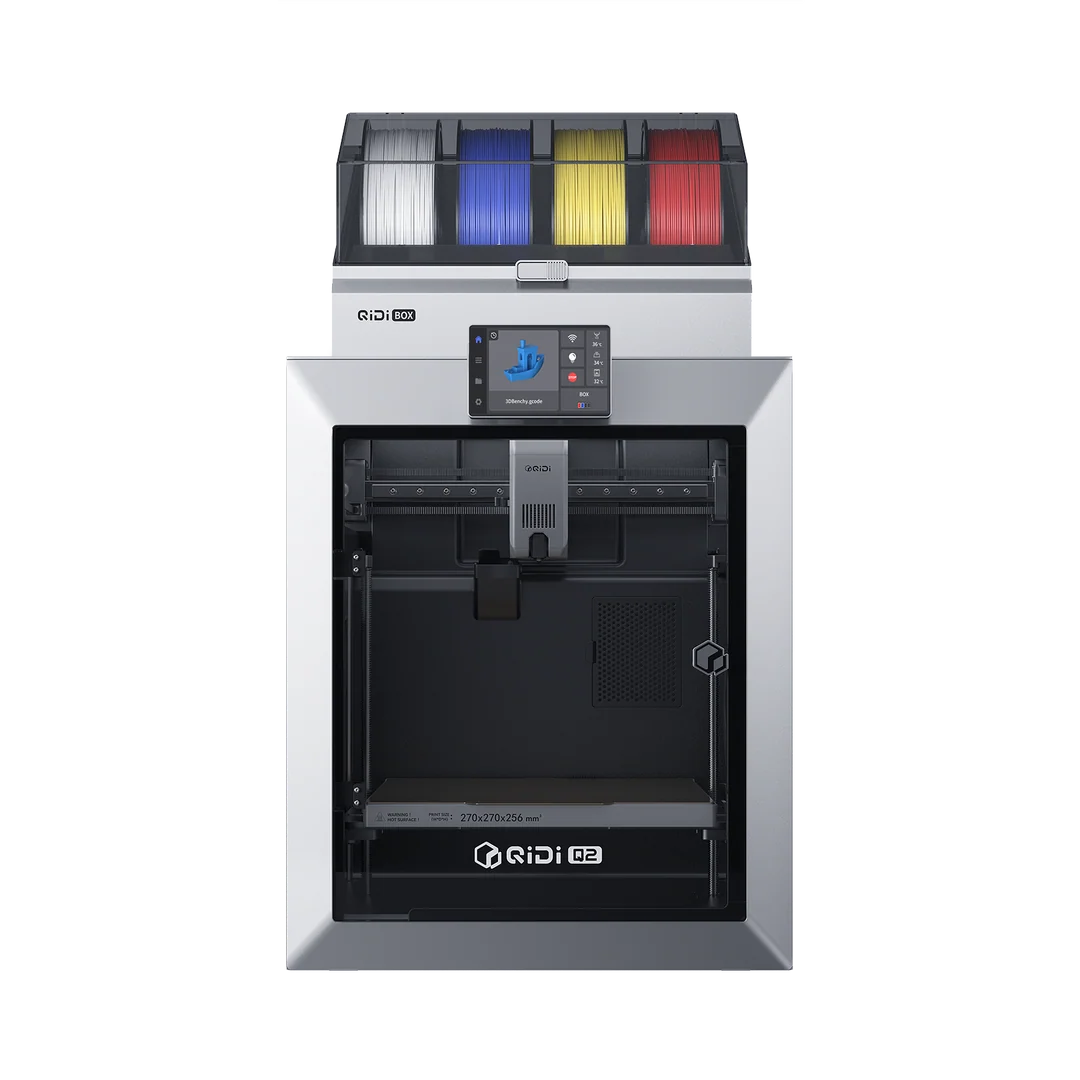
Multi‑color and multi‑material are exciting, but they add complexity. QIDI’s approach is to keep the printer focused on reliable motion and first layers, then let you add a filament box when you want to branch out. The accessory integrates with the Q2 for color changes, filament conditioning, and spool management while printing.
QIDI states you can chain up to four boxes for a total of 16 colors or materials, and each unit provides real‑time drying up to 65 °C to keep filaments conditioned during long jobs. A dual‑gear extrusion path in the box is designed to push tougher materials—useful when feeding carbon‑ or glass‑filled composites through change sequences—and the system can automatically reload spools to avoid mid‑print interruptions.
The box also includes NFC recognition for QIDI‑branded filaments and safety features such as a smart PTC fuse with dual temperature sensors that cut power if abnormal heat is detected. As with any multi‑color workflow, expect purge towers or wipe walls, extra material use, and longer job times. The upside is that you can start with single‑material prints and add this layer of capability later, rather than buying a separate multi‑material machine on day one.
If you’re curious about multi‑color options and how they pair with Q2, you can start at the QIDI website and look for the compatible accessory from the Q2 area. That way you can confirm the chain limit and how drying integrates during a live print on your planned materials.
Chain up to 4 QIDI BOXes for 16 colors, 65 °C drying while printing, and a Dual-gear drive for composites are the highlights to weigh against the added workflow complexity.
Speed, stability and surface finish in practice
Speed claims are useful for a sense of headroom, but your first projects should balance flow, layer time, and surface quality. QIDI lists up to 600 mm/s toolhead speed and 20,000 mm/s² acceleration for Q2, while noting that practical speeds vary by material and nozzle. The company cites around 300 mm/s for high‑speed PLA or ABS profiles as a typical range.
What matters more than a peak number is stability at the speeds you actually intend to use. Linear guide rails and the full‑metal frame are aimed at consistent motion over time, while resonance control and 1.5GT belts target smoother walls by reducing mechanical ringing. Start with moderate profiles, print parts you know well, then raise speeds until you find the boundary where details or surfaces begin to degrade for your material and nozzle.
Up to 600 mm/s toolhead speed is the ceiling, Real-world speeds depend on material, and Linear guide rails for durability describe why you can treat the Q2 as a platform you can grow into rather than one you outgrow quickly.
Setup, slicers and connectivity
On day one, you can keep software simple and stay local if you prefer. QIDI recommends its own QIDI Studio for profiles tailored to the Q2, and notes that the printer runs Klipper, which opens the door to third‑party slicers such as OrcaSlicer and PrusaSlicer. That flexibility is helpful if you plan to customize flow, pressure advance, or time‑saving supports later.
Connectivity options cover remote and offline preferences: QIDI Cloud for monitoring, 2.4G/5G Wi‑Fi and Ethernet (LAN) for home networks, and USB for entirely offline printing. You can start with USB to remove network variables while you learn, then add LAN or Cloud once you want remote checks or transfers.
For profiles, slicer compatibility notes, and connection setup, visit the QIDI Q2 3D Printer area and look for the specs, FAQ, and download links. That’s also where you’ll find reminders about supported file formats (STL, OBJ, 3MF, STEP/STP) if you’re moving between CAD tools.
Works with OrcaSlicer and PrusaSlicer, uses QIDI Studio profiles, and connects over LAN, Wi‑Fi, USB, or Cloud—pick the path that suits your environment.
When a larger QIDI model makes sense
Most home projects fit inside the Q2’s 270×270×256 mm volume. If you routinely exceed that or need higher throughput on larger parts, QIDI’s current range points to newer, bigger models as successors to discontinued lines. Here’s when stepping up makes sense and what changes.
QIDI states that the Q1 Pro is discontinued and directs buyers to Q2 as the replacement, with the chamber raised to 65 °C, the hot end to 370 °C, and the build volume increased—so if you’ve been considering a used Q1 Pro, check whether Q2 already covers your size and filament goals. For truly large prints, the company notes that X‑Max 3 is discontinued in favor of the Max4 line, which increases build volume and lists higher toolhead speeds. In the mid‑range, Plus4 is discontinued with Plus5 described as its direct successor and roughly 18% more volume.
If you’re uncertain where your work will land, start by measuring a few representative parts and blocking out support space. If they fit on Q2 with margin, the enclosed chamber, filtration, and expansion path to multi‑color make it the simpler place to begin. When your projects demand bigger plates or higher single‑part throughput, you can revisit the larger lines on the QIDI site and confirm the most current Max or Plus models and volumes.
Q1 Pro replaced by Q2, Max4 for 390×390×340 mm builds, and Plus5 succeeds Plus4 are the shifts to be aware of as you shortlist options.
Larger builds and the Max4 line
Choose a large‑format machine when your parts exceed Q2’s 270×270×256 mm volume or you need to nest multiple big items per job. QIDI indicates that Max4 is the current large‑format line with a 390×390×340 mm build volume and a higher listed toolhead speed. The price, footprint, and material consumption will climb accordingly, and the tuning window tightens as parts get bigger—so step up only when you consistently need the extra space.
Midrange updates: Plus5 replaces Plus4
If your projects are occasionally larger or you want more mid‑range volume without going full large‑format, QIDI identifies Plus5 as the successor to Plus4 with about 18% more build volume alongside similar high‑temperature capabilities. That tier can make sense for prototyping medium‑sized enclosures or jigs. Just verify that your typical parts don’t already fit on Q2; keeping the smaller footprint and simpler setup is often better for a first printer.
Next step: measure two or three designs you actually plan to print, including support clearance. If they fit within Q2’s envelope, prepare PLA or PETG to learn profiles, then move to ABS or PC once you’re comfortable. When you want multi‑color, return to the Q2 area on the QIDI site to find the compatible accessory and confirm how many spools you intend to run.