


This article contains affiliate links. We may earn a commission if you buy through them.
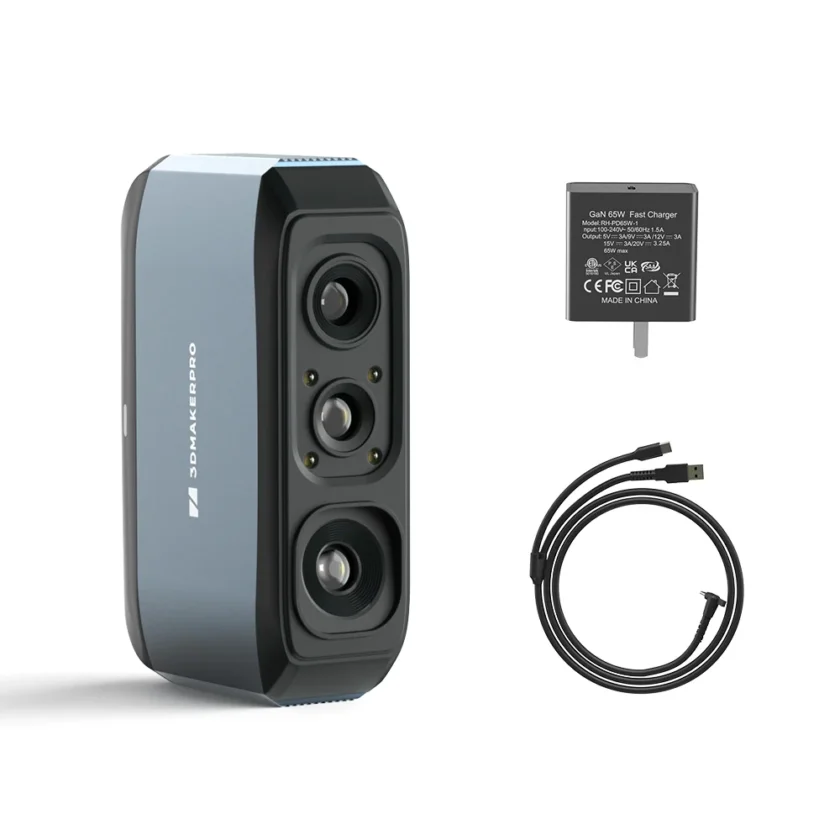
You’re holding a mid‑sized mechanical part and wondering if a portable scanner can capture it cleanly enough for design work. The 3DMakerpro Moose Scanner targets exactly this job: medium‑format object capture with listed 0.03 mm accuracy and 0.07 mm resolution in a marker‑free workflow guided by the included software. Before you choose a setup, here’s how Moose compares to 3DMakerpro’s small‑object model for tiny features and its LiDAR unit for rooms—and how the software and optional CAD add‑on fit a real reverse‑engineering pipeline.
Why the 3DMakerpro Moose Scanner fits medium objects
If your part sits in the middle ground—think brackets, housings, pump bodies, fairings, or fixtures—the Moose’s specification aligns with that range. Use Moose for 15–1500 mm objects: its typical object size covers most handheld and benchtop components, while a 200 × 100 mm single capture and 150–400 mm working distance make smooth, repeatable passes practical. The device lists 10 fps capture, which supports steady sweeps without rushing.
The Moose emphasizes an easy setup: Marker‑free AI visual tracking means you don’t have to dot the part with stickers in ordinary cases. Instead, JMStudio provides real‑time feedback and one‑click cleanup. Color‑sensitive work is also feasible because the scanner records 24‑bit textures alongside geometry, useful when you want to locate labels, wear areas, or paint boundaries in your model.
On paper, the numbers are compelling: 0.03 mm accuracy, 0.07 mm resolution. In practice, what this changes is your tolerance headroom. If your downstream task is 3D printing a replacement or using a mesh as a design reference, this level of detail often suffices for fit checks and surface continuity. If your tolerances are consistently down near a few hundredths of a millimeter, you’re heading into the Seal’s territory for micro‑detail.
Surface prep still matters. Transparent or highly reflective parts can confuse any optical scanner; 3DMakerpro advises a scanning spray for those materials. For many mid‑size pieces, a simple turntable stabilizes rotation, and a small tripod lets you anchor the part while you walk the sensor around it.
JMStudio supports capture, optimization and exports in STL, OBJ, PLY and ASC—”Free with every scanner” per the Moose page—so you can move directly into mesh inspection or slicing once you’re satisfied with coverage. Performance will depend on your computer: 3DMakerpro posts minimum and recommended specs for Windows and macOS, plus extended mobile support for connecting via Android or iOS.
Ready to compare Moose models and bundles? Visit 3DMakerpro Moose Scanner and look for the Moose series options, then match the kit (e.g., tripod or turntable) to your workspace.
Seal versus Moose: when tiny detail matters
Small parts put different pressure on a scanner. The Seal 3D Scanner is tuned for miniature objects with 0.01 mm accuracy and 0.05 mm resolution, a 100 × 75 mm single capture and a shorter working distance. That’s the realm where tiny edges, fine knurling, shallow engravings, or micro bevels decide whether a capture is viable. Pick Seal for 0.01 mm micro‑detail when those features dominate and the object itself is physically small (roughly 10–300 mm typical).
By contrast, Moose’s specification trades a little micro‑precision for broader coverage and ergonomics. With a larger capture window (200 × 100 mm) and medium‑object size range (roughly 15–1500 mm typical) as listed in the Moose tech specs, Moose lets you progress faster around bigger geometries without constantly repositioning or fighting edge loss on each pass. Pick Moose for wider capture range when the part’s overall size is the constraint and your tolerance needs are compatible with its listed accuracy.
A practical decision boundary: if the critical features you must represent are consistently below ~0.1 mm and the object is small, start with Seal. If the object is hand‑sized up to about a meter and needs smooth, reliable coverage more than micro‑scale inspection, Moose is built for that job. These thresholds align with the Seal and Moose specs (0.01 mm accuracy for Seal; 15–1500 mm typical object sizes for Moose).
Scanning rooms and sites? Consider Eagle LiDAR
Rooms, facades, shop floors and sites are another category entirely. The Eagle LiDAR Scanner is built for spatial capture at distance, with a listed 80–140 m scan range, 40–70 m radius (reflectivity dependent), and a 360° × 59° field of view. Accuracy is quoted as 2 cm at 10 m and 5 cm at 40 m. For reality capture workflows—surveying, architecture, digital twins—those numbers and the ability to collect up to 200,000 points per second are what move the needle.
Eagle also integrates imaging—up to four 48 MP cameras with 8K HDR options—and an on‑device live preview so you can check coverage on site. Its companion software handles real‑time point cloud processing. According to the Eagle FAQ, output formats include PLY (color point cloud and Gaussian splatting) and OBJ. The same FAQ states the scanning software supports Windows 11.
Use Eagle for rooms, facades, and sites; it’s more equipment‑intensive than a handheld object scanner, but it condenses spatial capture into an all‑in‑one workflow that object‑focused tools aren’t designed to match.
Plan a scan: a worked example for a metal part
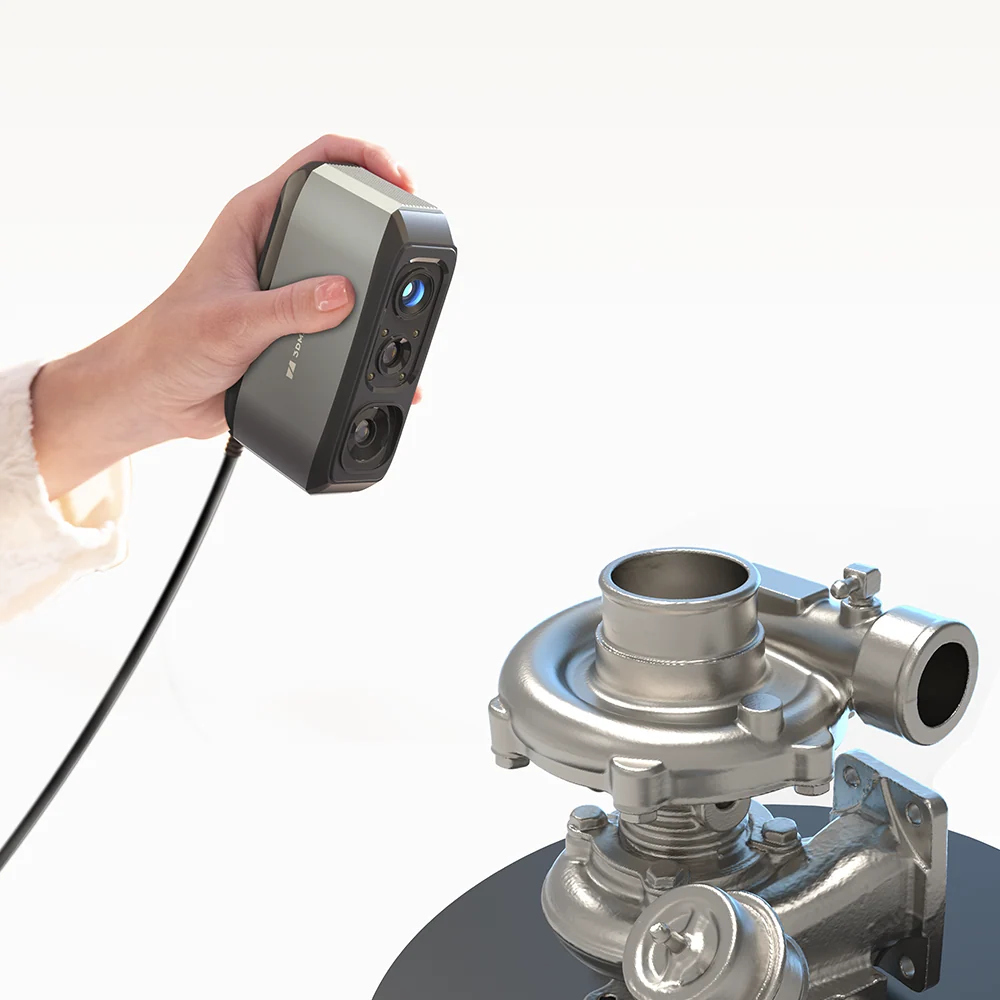
Imagine a cast‑aluminum turbocharger housing on your bench. It’s reflective, has a mix of smooth curves and sharp flanges, and you need a mesh for 3D printing a mating cover and to reference in CAD.
Prep: degrease, matte the shiny areas with a scanning spray to tame reflections, and mount the part on a basic turntable so you can rotate it without touching the housing. Prep reflective parts with scanning spray when surfaces are glossy or transparent; this improves tracking and point quality.
Setup: connect Moose and open JMStudio. The Moose’s working distance of 150–400 mm is short enough to keep your hands comfortable while you orbit the part. A 200 × 100 mm single capture encourages overlapping passes; 10 fps supports a steady pace without racing the sensor.
Capture: start a pass across the compressor volute, tilt to trace the flange edges, then walk around the turbine side. If tracking slips on a uniform section, sweep back toward a high‑feature area. The AI visual tracking reduces the need for markers on this kind of geometry.
Optimize: in JMStudio, run the guided cleanup to cull stray points and fuse the aligned frames. Use automatic alignment when you combine scans from different orientations—JMStudio can usually stitch them seamlessly. If small holes remain near the volute inlet, do a short targeted rescan and merge.
Export: when coverage and fidelity look sound, Export STL/OBJ/PLY/ASC from JMStudio for printing or inspection. If your next step is surface creation and neutral CAD exchange, plan to move the mesh into Geomagic Wrap for feature fitting and STEP/IGES export.
Decision guardrails: if your part has critical micro‑features under ~0.1 mm (e.g., tiny serial‑number embossing you must replicate), consider the Seal instead. If what you really need is the surrounding bay or a full test cell, pivot to Eagle for spatial capture.

JMStudio software: capture, optimize, and export
JMStudio is the through‑line for Moose and Seal users. It connects the scanner, provides real‑time feedback while you move, and then consolidates frames with alignment aids and cleanup. You can run intelligent routines that remove misaligned points while preserving valid geometry, and export your result to widely compatible formats for printing or modeling. One‑click optimize in JMStudio helps accelerate this step when you’re iterating on a part.
For joining scans taken from different orientations or on different days, Auto align for seamless joins automates most of the stitching. You still decide whether to capture more data or to repair sparse patches, but the baseline tasks—connect, calibrate, capture, optimize, export—are all in one place.
Platform support and performance matter. Moose lists Windows 10/11 (64‑bit) and macOS 12/13/14 compatibility, plus extended Android/iOS support for mobile connection. As meshes get heavier, GPU and RAM become the limiter—3DMakerpro also posts minimum and recommended specs so you can plan workstation upgrades if your projects grow.
Eagle’s companion workflow is different because it handles point clouds and panoramic imagery for entire rooms and sites, including real‑time point‑cloud processing and exports to OBJ and Gaussian‑splatting PLY for visualization pipelines. If you cross between object scanning and spatial capture, expect to switch tools and OS support accordingly.
Reverse engineering add‑on: Geomagic Wrap for 3DMakerpro
When your scan must become editable CAD, meshes alone aren’t the finish line. Geomagic Wrap for 3DMakerpro (Essential) extends your toolkit with point‑cloud editing, advanced polygon healing, measurement and accuracy tools, prismatic feature detection and constrained fitting, curve drawing, and automatic surfacing. That combination lets you build analytic geometry from a Moose or Seal mesh, then Export STEP/IGES for CAD handoff to a neutral environment.
Wrap’s Essential edition is a lifetime license with updates (per the Editions Comparison) and adds the CAD‑conversion features beyond the Lite edition. It’s designed for object scanning; 3DMakerpro notes it may not be optimal for Eagle’s spatial scans. Plan on a Windows workstation and a capable GPU—Oqton lists Windows 8.1–Windows 11 (64‑bit) support and recommends NVIDIA Quadro‑class graphics for stability.
For parts with dominant planes, cylinders, and cones, automatic detection plus constrained fitting speeds up the process of turning mesh regions into editable features. On organic shapes, Automatic surfacing available in Essential lets you generate a NURBS surface suitable for downstream sculpting, inspection, or manufacturing documentation.
Support, updates, and store policies
Beyond specs, the store experience sets expectations. The 3DMakerpro site states 7‑day returns, 14‑day price protection, a Two‑year warranty stated by store, and Lifetime OTA updates noted. You’ll also find tutorials, a forum community, and live chat/email for help getting from an initial scan to a dependable routine.
On product pages, shipping timelines are outlined—for example, Moose orders for the US are listed to ship from a US warehouse in 1–3 business days once processed. For Eagle, the FAQ covers accessories, safety certification (Class 1), and that scanning software support is currently Windows 11. Duties, shipping methods, and availability can vary by country and inventory, so confirm the current policy details on the official pages before you purchase.
Is 3DMakerpro right for your workflow?
Putting it together, Match the scanner to object size and task. Moose is the practical fit for medium objects where you want dependable, marker‑free handheld capture in a guided workflow. Seal is the option when micro‑features and jewelry‑scale items demand 0.01 mm accuracy (single‑frame, lab conditions). Eagle is for interiors, facades, and sites where you’re modeling spaces rather than objects. If you need analytic surfaces and neutral CAD exchange, add Geomagic Wrap to your Moose or Seal pipeline.
Next step: list your critical dimensions and finish constraints, then confirm whether the object itself fits Moose’s typical 15–1500 mm size range as listed by 3DMakerpro. If it does, visit 3DMakerpro to review the Moose options, check current system requirements against your workstation, and decide whether to include a turntable, tripod, or the Geomagic Wrap add‑on in your build.