


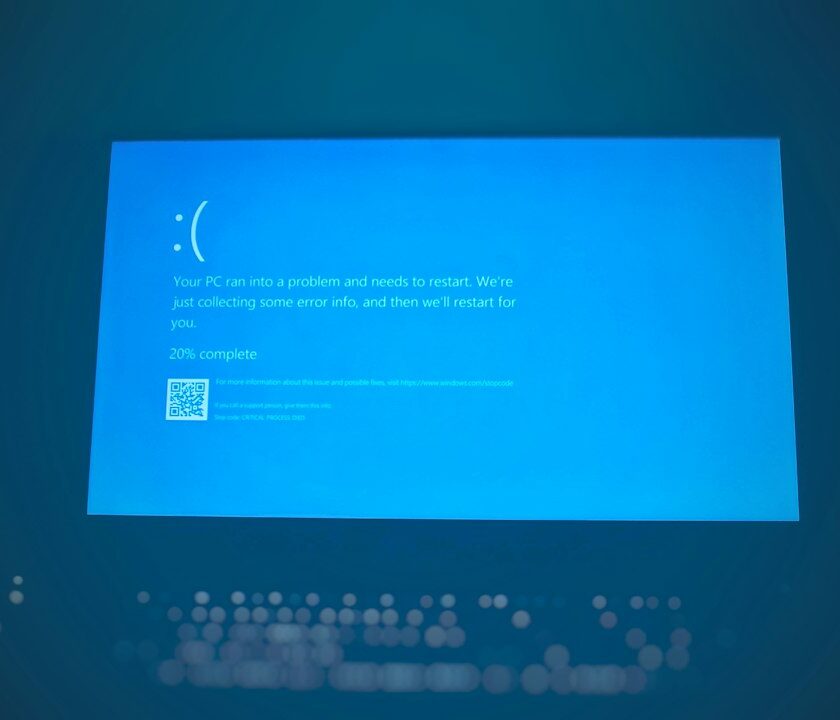
If you are staring at a silent machine and searching for PC won’t turn on troubleshooting, this field-tested hardware guide lays out a safe, repeatable workflow to find where power stops and what to do next. You will learn how to verify each link in the power path, isolate shorts without harming components, interpret motherboard signals, and make practical repair-or-replace calls while keeping data priorities front and center.

PC won’t turn on troubleshooting checklist
When a computer refuses to power on, the fastest way to a clear answer is a consistent process. Use this checklist to avoid guesswork, avoid unnecessary part swaps, and keep safety in mind. Work top to bottom. If the symptom changes at a step, pause and record what changed.
- Prove the outlet with a lamp or outlet tester. If uncertain, try a different circuit.
- Inspect cords, surge strips, and UPS units for damage, tripped switches, and loose plugs.
- Desktop: confirm the PSU rear switch is on and any 115/230 V selector is set correctly.
- Laptop: verify the charger’s output with a multimeter; if possible, try a known-good adapter of the correct wattage and tip or USB‑C PD profile.
- Power reset: remove AC and battery (if removable), press and hold the power button for 20–30 seconds, reconnect, and try again.
- Observe indicators: adapter LEDs, motherboard standby LEDs, battery status lights, and any brief flickers.
- Desktop bare-minimum boot: board on standoffs, CPU and cooler, one RAM stick in the primary slot, onboard video if available, keyboard, and power—nothing else.
- Listen and look for POST feedback: beeps, debug LEDs, Q‑codes, or laptop blink patterns; log what you see.
- Isolate possible shorts: unplug front-panel USB and audio, drives, add‑in cards, and new accessories.
- Document as you go: photos of headers and cables, readings from the meter, and which parts are attached at each step.
That simple structure keeps you focused on evidence: power availability, load behavior, and system responses. Computers follow a sequence. If you check the sequence in the same order each time, tough cases become manageable.
Safety, ESD control, and practical tools
Electricity and static discharge can quietly create new problems while you are chasing the old one. Before opening any computer, disconnect AC power. For laptops, pull the plug and disable or remove the battery when the design allows. Avoid metal jewelry, work on a clean surface, and keep liquids away from the bench. If you have an ESD strap, connect it to a grounded point and keep your strap on throughout the session. If you don’t, touch a grounded metal chassis periodically to equalize charge.
Gather a short list of tools that genuinely help during no‑power cases. The goal is not to own everything—only what speeds confident checks.
- Digital multimeter: confirms wall AC, adapter DC, PSU rails, continuity through fuses, and voltage drop under load.
- Outlet tester or a small lamp: proves the circuit quickly and exposes reversed hot/neutral wiring.
- PSU tester or paperclip bridge for desktops: used with caution to verify spin‑up behavior and the presence of +12 V, +5 V, +3.3 V, and +5 VSB.
- Precision drivers, plastic spudger, and tweezers: let you open cases, unlatch connectors, and handle small parts without damage.
- Flashlight and magnifier: reveal cracked DC jacks, scorched headers, or bulged capacitors that are easy to miss in dim light.
- Isopropyl alcohol, cotton swabs, and a soft brush: clean sticky residue and corrosion from contacts and ports.
- Thermal paste and cleaner: needed if you reseat a CPU cooler during bare‑board tests.
Label screws and store them by length and location. A wrong-length screw can pierce a laptop palm rest or pinch a motherboard trace against the chassis—both can produce a puzzling no‑power symptom.
How power flows from the outlet to the board
Understanding the path that energy takes from the wall to the CPU helps you decide which measurement matters next. In a desktop, AC enters the PSU, which creates several DC rails. The +5 V standby rail (+5 VSB) is present whenever the PSU switch is on and AC is live. The front power button signals the motherboard to pull PS_ON low, instructing the PSU to enable the main rails. When the PSU detects stable conditions, it asserts PWR_OK, and the board proceeds with initialization.
Laptops route adapter power through an input path controlled by a charger or power‑management integrated circuit (PMIC). Depending on make and model, the system may authenticate the adapter through an ID pin in a barrel connector or via USB‑C Power Delivery negotiation. The battery sits behind that path and may supply, supplement, or accept charge depending on firmware decisions and the current power state. If the adapter is missing, unrecognized, or undervalued for wattage, the laptop can refuse to power on or may run only at reduced capability.
Mapping that flow quickly exposes likely failure points: a dead outlet, tripped surge protector, damaged cable jacket near a strain relief, an incorrect voltage selector, a PSU with an unstable standby rail, a cracked DC jack, an open input fuse, a shorted USB port, or a mainboard that senses a fault and withholds rail enable signals. Write down the path and tick boxes as you prove each stage.
External power and cable checks you can do in minutes
The cheapest fix is sometimes outside the machine. Start with the outlet the computer actually uses. Plug in a lamp. If it flickers, you may have a loose connection or a breaker on the edge of tripping. Try a different outlet on another circuit. If a surge strip or UPS is in the chain, confirm its switch state and any resettable breaker. Many UPS units age out quietly; a battery past its service life can pass power intermittently and make a healthy PC look dead.
Trace the cord path. Look for flattened segments under chair wheels, crushed insulation behind furniture, heat discoloration, or bent plug blades. For laptops, watch the adapter LED while gently flexing the cable near the brick and near the tip. If the LED drops out with light movement, the conductor inside has fractured. Replacing an adapter is a small cost compared to wasted time chasing an intermittent source.
Lastly, confirm the basic switches: on a desktop PSU, the rocker should be fully in the on position. If a desktop unit includes a 115/230 V selector, make sure it matches the local mains. A mis‑set selector can cause immediate shutdown on power‑up or trip protection circuits that look like a dead machine.
Desktop power supply testing the right way
Desktops rely entirely on the PSU to deliver clean rails with enough current and tight regulation. Begin by checking for +5 VSB at the purple wire on the 24‑pin ATX connector while AC is present and the PSU switch is on. If +5 VSB is missing or unstable, the board cannot request a start. Swap in a known‑good PSU or bench‑test the suspect unit with a tester. If +5 VSB is solid, move to the start signal: press the case power button and observe whether the board pulls PS_ON low (green wire to ground). If PS_ON never changes state, suspect front‑panel wiring, the switch, or a board that has withheld the start request due to a sensed issue.
If you bridge PS_ON to ground using a dedicated PSU tester or the traditional paperclip method, attach a small load such as a case fan so the unit has something to drive. Many PSUs will spin a fan briefly even if a rail sags under load, so combine spin‑up with measurements. Use the meter to check rails under load. ATX tolerances are commonly within about ±5 percent for +12 V, +5 V, and +3.3 V rails during steady state, but real-world figures should be closer for a healthy unit. Significant droop during startup or when a drive connects often points to aging capacitors.
PSUs can present another trap: they may seem fine out of the case with a minimal load yet fail at power‑on in the build due to transient behavior or cross‑load conditions. If you have a known‑good unit, a quick swap is frequently the fastest way to clear PSU doubt, especially when symptoms include brief fan twitching, a single flash of LED activity, or a start that collapses immediately.
Laptop power path: adapter, DC jack, battery, and USB‑C PD
Laptops add several links to the power chain, so test them methodically. Read the label on the adapter for voltage and wattage, then measure tip voltage with a multimeter. Barrel‑plug designs from vendors like Dell often include an ID pin in the center that lets the laptop confirm authenticity and wattage. If the ID line is missing due to a broken conductor or a non‑OEM adapter, the laptop may refuse to power on from the adapter or may run without charging the battery.
USB‑C Power Delivery introduces another layer. The adapter and laptop negotiate a profile before delivering full voltage. If the cable does not support e‑marker requirements for higher power, or if the adapter only offers low‑power profiles, the laptop may behave as if no adequate adapter exists. Testing with a certified 100 W USB‑C cable and a reliable PD adapter removes that variable quickly.
Inspect the DC jack area closely. A jack that pivots or feels gritty often has cracked solder joints or internal wear. On models with modular DC‑in boards, replacing the board can be cleaner than micro‑soldering in tight quarters. If the battery is removable, try AC‑only with the battery out, and then battery‑only with the adapter removed. If the system powers on in one configuration but not the other, you have isolated the suspect link.
Finally, watch the small signals. Some adapters show a steady LED when a normal load connects and blink or go dark when a short is detected. Some laptops blink status LEDs in patterns that map to input, battery, or board faults. Record any pattern and compare it with the manufacturer’s service guide for that family; even without a guide, a repeating pattern often tells you that the laptop detects a condition and is choosing not to enable the main rails.
Front panel switches, headers, and mechanical gotchas
Many “dead” desktops come down to front‑panel wiring or a mechanical short. Confirm the header pinout in the motherboard manual or silkscreen. Ensure the PWR_SW connector sits across the correct two pins and that the polarity of LEDs is correct. If the case button is questionable, briefly short the power‑switch pins with a screwdriver to simulate a button press. Only a quick tap is needed. If the system starts, replace or repair the case switch assembly.
Check power connectors. The 24‑pin ATX and the CPU 4/8‑pin connectors must be fully seated; a half‑latched CPU power lead is a classic cause of a lifeless board. Reseat RAM modules until the latches click and make sure the primary slot is used when testing with a single stick. If your CPU provides integrated graphics, remove any discrete GPU while testing to remove a variable and lower power draw at start.
Scan for mechanical problems that look electrical. A misplaced standoff under the motherboard can push into exposed pads and create a short to chassis ground. Screws longer than the design expected may contact traces. Front USB ports with bent contacts or debris can short the 5 V line as soon as the system tries to start. Unplug front‑panel USB and audio cables during isolation to see if the symptom clears.
POST feedback: beeps, LEDs, Q‑codes, and blink codes
Even a seemingly silent system may be telling you something. Traditional beep codes map to boot stages like CPU initialization, memory training, video detection, and boot device enumeration. Count the pattern and consult the board’s manual or vendor knowledge base. Many modern motherboards add debug LEDs labeled CPU, DRAM, VGA, and BOOT that light during each stage; if the DRAM LED stays lit, try one RAM module in the primary slot, reseat it, and test known‑good memory if available. If the CPU LED remains on, revisit CPU power, cooler pressure, and socket pins.
Boards with two‑digit Q‑code displays provide even more precision by reporting hexadecimal codes per stage. Record the code, watch if it changes after a reset, and search vendor documentation. A code that loops early can indicate that the board is withholding rail enable, that memory failed to train, or that a short exists on a peripheral bus. Laptops often express similar status through blink codes on the caps‑lock light, power light, or dedicated status LEDs. While patterns vary by brand, a repeated count is rarely random; it is a clue.
Use a logbook. Write down which indicators show, what you changed, and what appeared next. Those notes prevent you from circling back to the same configuration and let you share clear evidence if you hand the case to a teammate or a service center.
Hunting shorts and isolating faulty components
Short circuits anywhere on USB headers, fan rails, lighting strips, or add‑in cards can pull a rail low and stop a system from starting. The most efficient test is subtraction: disconnect everything non‑essential and try to start with only the minimum parts required. If the symptom clears, add parts back one at a time until the failure returns. The last part reintroduced is your prime suspect. This approach costs nothing and protects parts from repeated inrush stress.
Look closely at high‑wear areas. Front USB ports collect dust, coins, and metal shavings that can bridge contacts. RGB lighting controllers and splitters can back‑feed weird voltages into headers. Case fans that nick their own wires can intermittently short when a blade flexes. Unplug each accessory in turn and test. For desktops with discrete GPUs, test integrated graphics when possible, because some GPUs present faults that collapse a PSU even before POST.
If you are comfortable with the meter, a quick resistance check across a rail with no power applied can reveal an obvious short. For example, checking resistance to ground on the +5 V rail at a front‑panel USB header can uncover a short even before the system tries to start. Continuity checks across surface‑mount fuses near a laptop DC‑in can expose a blown protection device. Replace only the failed accessory or board; do not keep powering a system that shows clear evidence of a short, because repeated attempts can spread damage.
Protecting data and checking boot media safely
Hardware power issues often overshadow the most important asset: data. If the system refuses to power but storage appears intact, consider moving the drive to a known‑good reader or computer to copy critical files. Use antistatic procedures, label the drive, and avoid touching exposed logic on NVMe and 2.5‑inch SSDs. For SATA drives, power down fully before disconnecting; consumer boards are not designed for hot‑plug swaps without risk.
Boot media can complicate power symptoms. A desktop that powers on briefly and then shuts off may actually be reacting to a faulty USB device drawing more current than expected or confusing the firmware during early boot. During isolation, remove all external USB devices except a simple keyboard and mouse. If the machine eventually powers and POSTs, reinsert devices one at a time and examine any that cause resets or stalls in early boot.
If encryption is present, communicate early about keys and recovery methods. Even if your initial goal is hardware clarity, a quick check that you have recovery access reduces later delays after a board or drive swap. Treat data transfer logs as part of your documentation so you can demonstrate what was copied, when, and to where.
Repair vs. replace: clear decision factors
Once you narrow the fault to a specific link, decide whether to repair or replace that link using objective criteria. The goal is to cut downtime and cost without re‑introducing fragile parts.
- Age and duty cycle: older PSUs and heavily used adapters have a limited lifespan; replacing them improves stability and efficiency.
- Part availability: if a PSU or DC‑in board is available locally, replacement may beat a long diagnostic session with uncertain payoff.
- Access complexity: a DC jack buried under the motherboard can turn into a full teardown; a modular DC‑in board often swaps in minutes and lowers labor risk.
- Interdependencies: if a suspect PSU may have stressed the board, validate with a known‑good unit before buying a new motherboard. Avoid replacing multiple parts blindly.
- Business impact: when people are waiting, a rapid swap of a commodity part (PSU, adapter, front‑panel assembly) often pays for itself in saved time.
Be transparent about uncertainty. Share what you proved, what is still unproven, and which step offers the cleanest path to a working system. A short write‑up with a cost and risk comparison helps others understand why a new adapter or PSU is the next step rather than a guess.
Maintenance, documentation, and smoother future support
Many no‑power calls start as slow‑burn issues: dust choked a heatsink, a surge bar aged out, or a cable frayed slowly at the strain relief. A small maintenance routine and better notes make the next failure faster to unravel and less likely to happen in the first place. Keep the routine simple and track it on a calendar.
- Quarterly dust cleanup: hold fans to keep them from overspinning and blow dust out of heatsinks, PSU intakes, and laptop vents. Lower temperatures reduce stress on VRMs and capacitors.
- Annual cable and adapter review: replace frayed cords and weak barrel tips on sight; label adapters so the right wattage follows the right laptop.
- Power quality: retire old surge strips, test UPS batteries, and confirm high‑value systems have clean power with enough runtime to shut down gracefully.
- Thermal monitoring: keep an eye on CPU and GPU temps using vendor tools; thermal throttling and sudden shutdowns often precede no‑power complaints.
- Firmware housekeeping: stable BIOS and firmware versions can improve power sequencing and device compatibility. Update thoughtfully with known‑good power.
Strong documentation habits pay off. Photograph header wiring before you pull it, note which RAM slots you used during single‑stick tests, and record meter readings with context. If you work with others, publish your template and checklists in a shared location so the team applies the same process. For a living library of tips and deeper dives, keep our Hardware Repair Tips section handy: hardware repair tips.
Combine maintenance with documentation and you cut future downtime while creating a quick‑start guide for whoever sees the machine next—your future self included.